To enjoy high-speed internet on your Jio network, configuring the correct APN settings is crucial. This guide provides step-by-step instructions for setting up Jio APN on Android and iPhone devices, ensuring optimal internet speed and connectivity. Troubleshooting tips are also included to resolve any potential issues.


In today’s digital age, knowing how to configure the Jio APN setting for high speed is crucial for staying connected, working remotely, and enjoying seamless entertainment. Jio, one of India’s leading telecommunications companies, offers high-speed internet services to millions of users. However, to fully utilize Jio’s network capabilities, it’s essential to configure your Access Point Name (APN) settings correctly. This guide will walk you through the steps to set up Jio APN settings for high speed internet on your device.
What is APN?
APN stands for Access Point Name. It is the gateway between a mobile network and the internet. Proper APN settings ensure that your device connects to the correct server, providing you with optimal internet speed and reliability. Incorrect APN settings can result in slow internet speeds, connectivity issues, or an inability to access the internet altogether.
Jio APN Settings for Fast Internet
Jio offers 4G LTE services across India, but to take full advantage of their high-speed internet, your device needs to have the correct APN settings. Jio APN for fast internet is typically configured automatically when you insert the Jio SIM card. However, in some cases, you might need to enter the Jio speed APN settings manually, especially if you experience connectivity issues or if you’re using an imported or unlocked device. To ensure the best performance, it is essential to use the Jio fast APN setting, which can significantly enhance your connection. For the best results, using the best APN for Jio 4G will help you achieve optimal internet speed and reliability.
Step-by-Step Guide to Jio APN Setting for High Speed Internet
Jio Best APN Settings for Android Devices
- Open Settings: Go to the “Settings” app on your Android device.
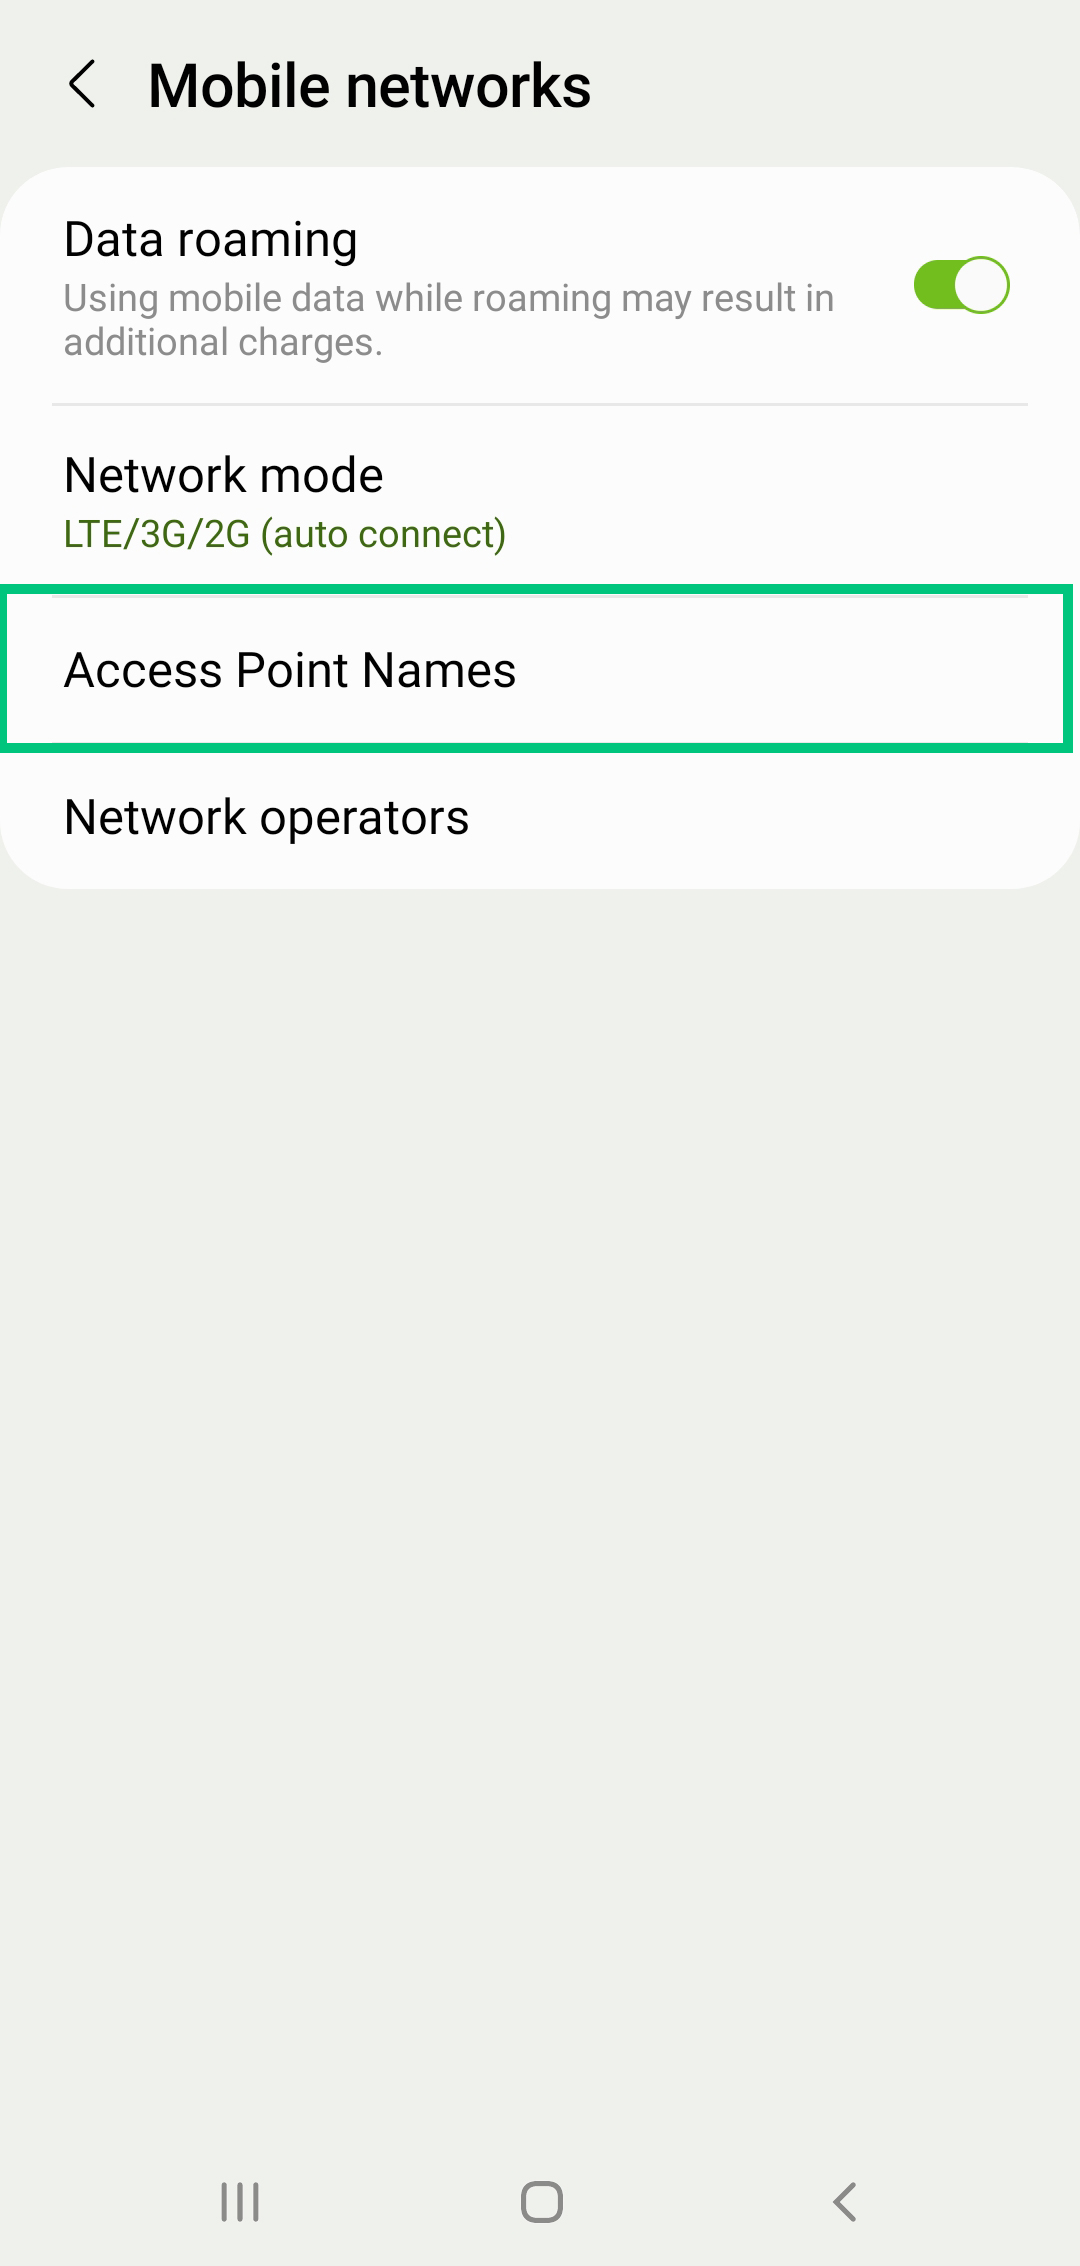
- Network & Internet: Tap on “Network & Internet” or “Mobile Networks,” depending on your device model.
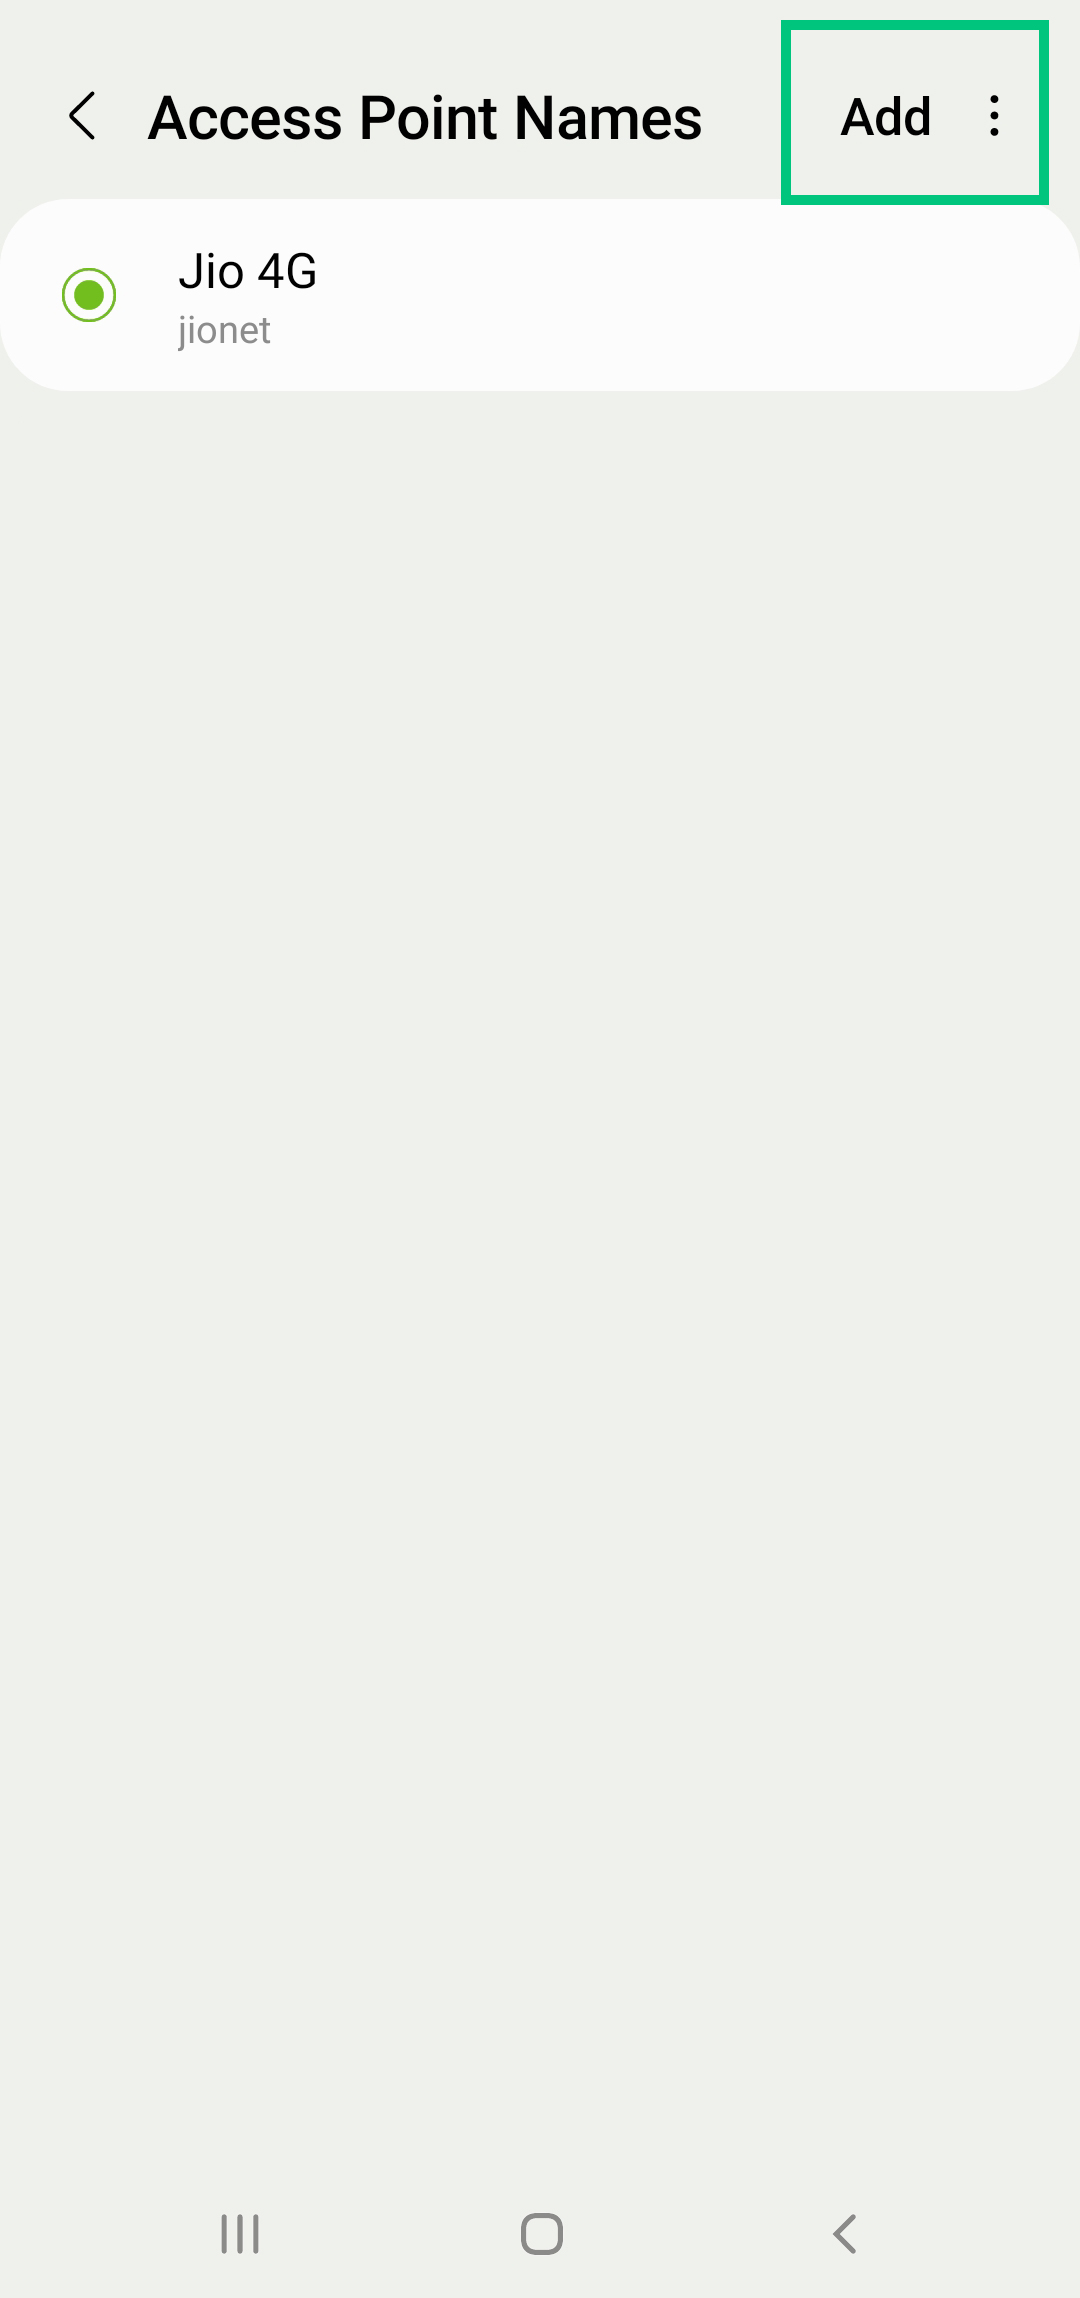
- Access Point Names (APN): Select “Access Point Names” or “APN.”
- Create New APN: Tap on the “Add” or “+” button to create a new APN.
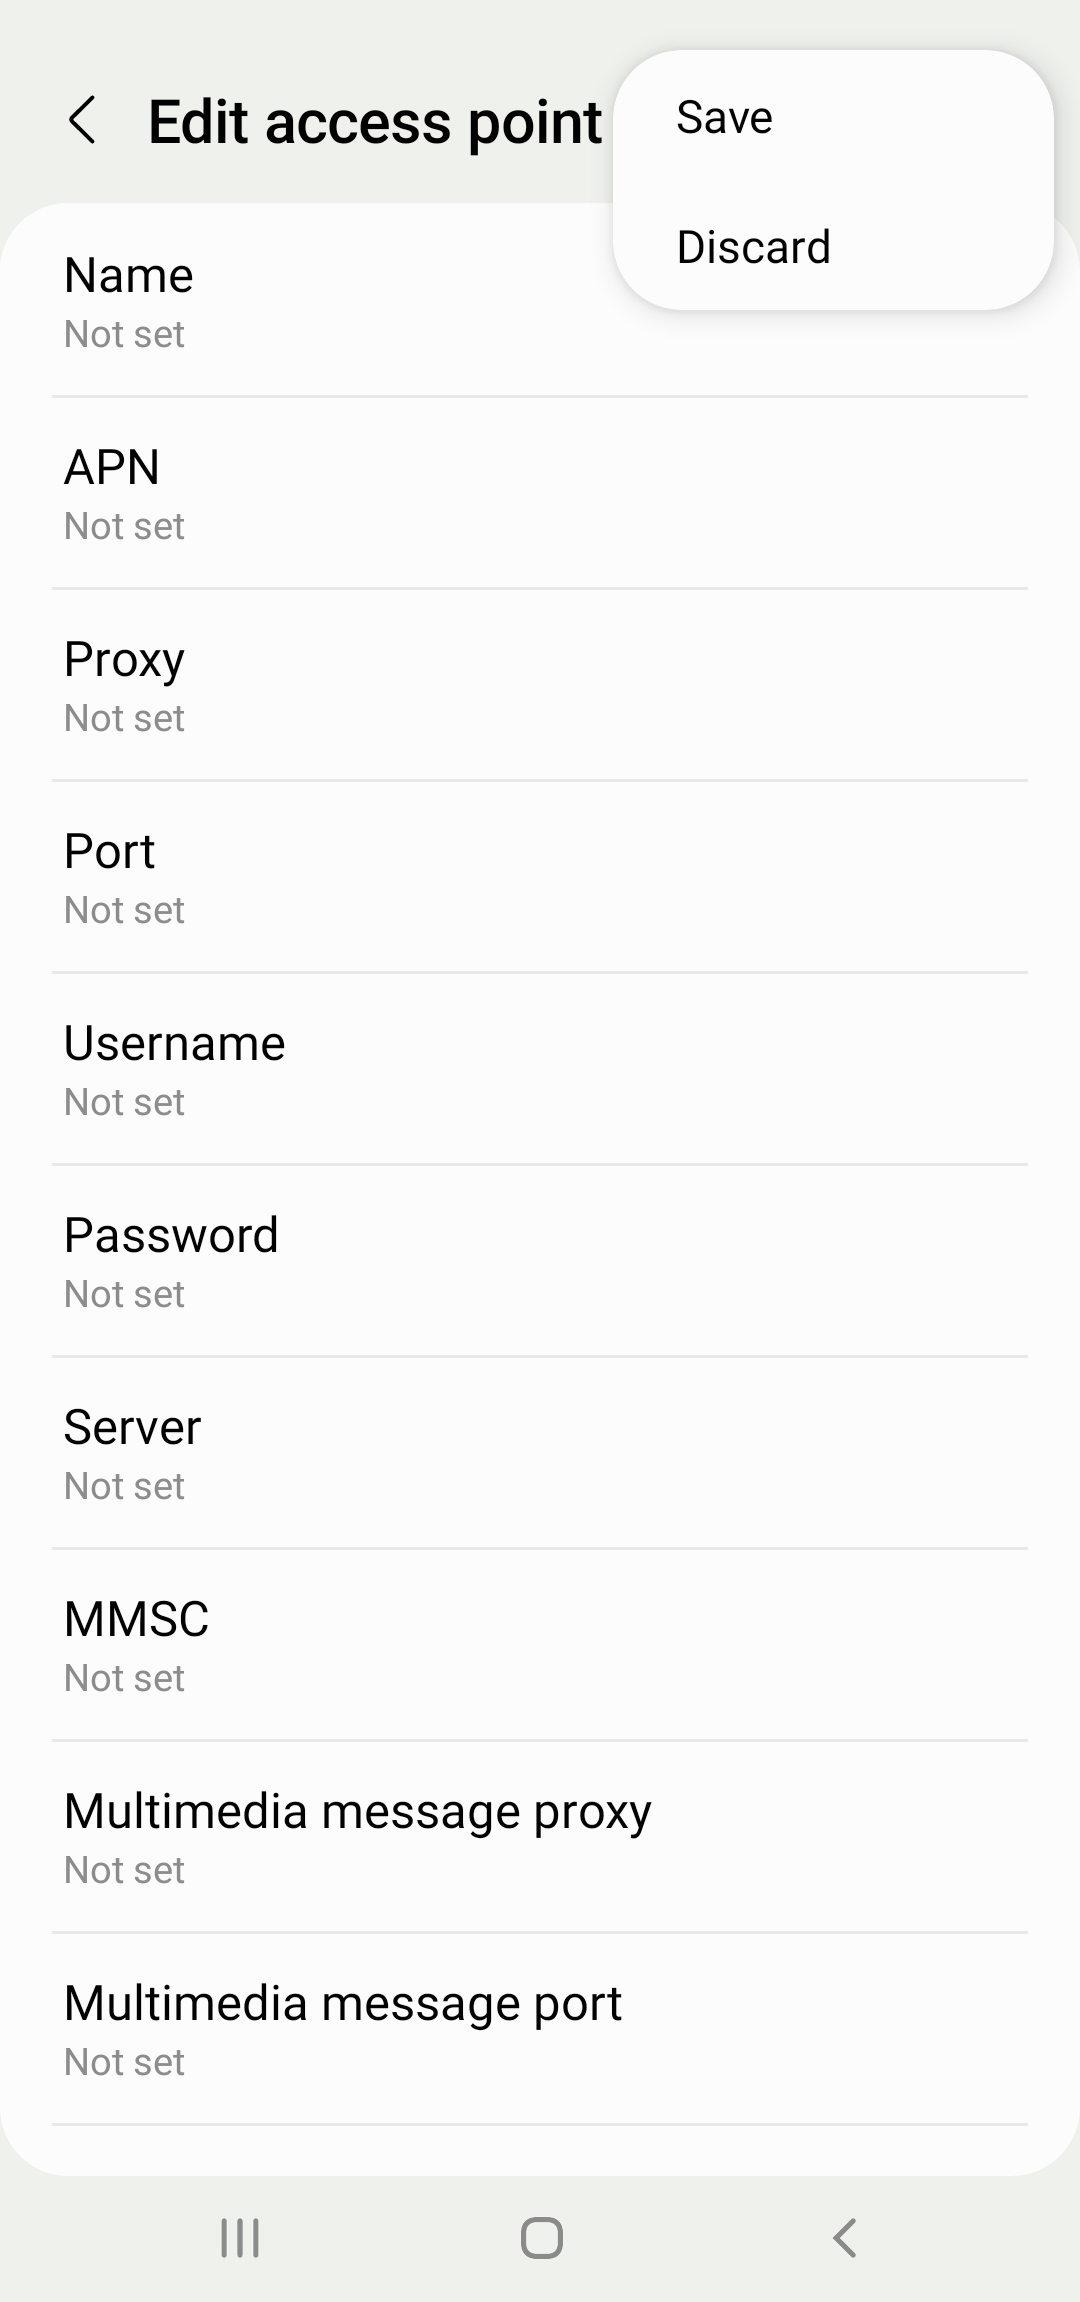
- Enter APN Details:
- Name: Jio 4G
- APN: jionet
- Proxy: Not set
- Port: Not set
- Username: Not set
- Password: Not set
- Server: Not set
- MMSC: Not set
- MMS Proxy: Not set
- MMS Port: Not set
- MCC: 405
- MNC: 857, 863, or 874 (use the one that works for your area)
- Authentication Type: Not set
- APN Type: default
- APN Protocol: IPv4/IPv6
- APN Roaming Protocol: IPv4/IPv6
- Bearer: LTE
- MVNO Type: None
- Save APN:
- After entering the details, tap on the “Save” button.
- Select the New APN:
- Select the new APN (Jio 4G) from the list of APNs.
- Restart Your Device:
- Restart your Android device to apply the new settings.
Table for Jio APN Settings for High-Speed Internet
| Setting | Android Devices | iPhone Devices |
|---|---|---|
| Name | Jio 4G | Not Required |
| APN | jionet | jionet |
| Proxy | Not set | Leave blank |
| Port | Not set | Leave blank |
| Username | Not set | Leave blank |
| Password | Not set | Leave blank |
| Server | Not set | Leave blank |
| MMSC | Not set | Leave blank |
| MMS Proxy | Not set | Leave blank |
| MMS Port | Not set | Leave blank |
| MCC | 405 | Not Required |
| MNC | 857, 863, or 874 | Not Required |
| Authentication Type | Not set | Leave blank |
| APN Type | default | Leave blank |
| APN Protocol | IPv4/IPv6 | Not Required |
| APN Roaming Protocol | IPv4/IPv6 | Not Required |
| Bearer | LTE | Not Required |
| MVNO Type | None | Not Required |


For iPhone Devices
- Open Settings:
- Go to the “Settings” app on your iPhone.
- Cellular:
- Tap on “Cellular” or “Mobile Data.”
- Cellular Data Options:
- Select “Cellular Data Options” or “Mobile Data Options.”
- Cellular Data Network:
- Tap on “Cellular Data Network” or “Mobile Data Network.”
- Enter APN Details:
- APN: jionet
- Username: (Leave blank)
- Password: (Leave blank)
- MMS Settings (optional):
- MMSC: Not set
- MMS Proxy: Not set
- MMS Max Message Size: Not set
- MMS UA Prof URL: Not set
- Save Settings:
- There is no save button; the settings are saved automatically.
- Restart Your iPhone:
- Restart your iPhone to apply the new settings.
Troubleshooting Common APN Issues
Even after configuring the APN settings correctly, you might face issues with your internet connection. Here are some troubleshooting tips:
- Check Data Balance:
- Ensure that you have an active data plan with sufficient balance.
- Network Coverage:
- Make sure you are in an area with good Jio network coverage.
- Flight Mode:
- Toggle the Flight Mode on and off to reset the network connection.
- SIM Card:
- Ensure that your Jio SIM card is properly inserted.
- Software Updates:
- Keep your device’s software updated to the latest version.
- Reset APN Settings:
- If issues persist, try resetting the APN settings to default and re-entering them.
Conclusion
Configuring your Jio APN settings correctly is essential for enjoying high-speed internet on your device. By following the steps outlined in this guide, you can ensure that your device is set up to take full advantage of Jio’s 4G LTE network. Remember, these settings can vary slightly depending on your device model and location, so don’t hesitate to contact Jio customer support if you encounter any issues.
By optimizing your Jio APN settings, you can enhance your internet experience, ensuring faster download and upload speeds, seamless streaming, and reliable connectivity. Stay connected and enjoy the high-speed internet that Jio offers with the right APN settings.
Comments are closed.